The last two months of my life have been absolute madness. We are in the process of buying a house which requires nothing short of my left arm and promise of our first born child. As such, although there's been time for cooking and picture-taking, there has been no time to write!
I thought I'd take a few minutes within the madness to share some of my favorite food blogs. I read and cook from these diligently, and a few of them (smittenkitchen,101cookbooks and thechubbyvegetarian) I check every day with utter disappointment when a new post does not appear in my reader! I can't take credit for the discovery of all of these myself, so thanks to those who have shared. Hope you enjoy reading and cooking recipes from some of my most well-loved bloggers. Let me know of your favorites I should add to the list.
101 Cookbooks
The Chubby Vegetarian
smitten kitchen
17 and baking
Figs, Bay and Wine
In Praise of Leftovers
picky cook
Tea and Cookies
seven spoons
Sprouted Kitchen
Happy reading and eating! More about cooking soon...
May 3, 2011
Apr 10, 2011
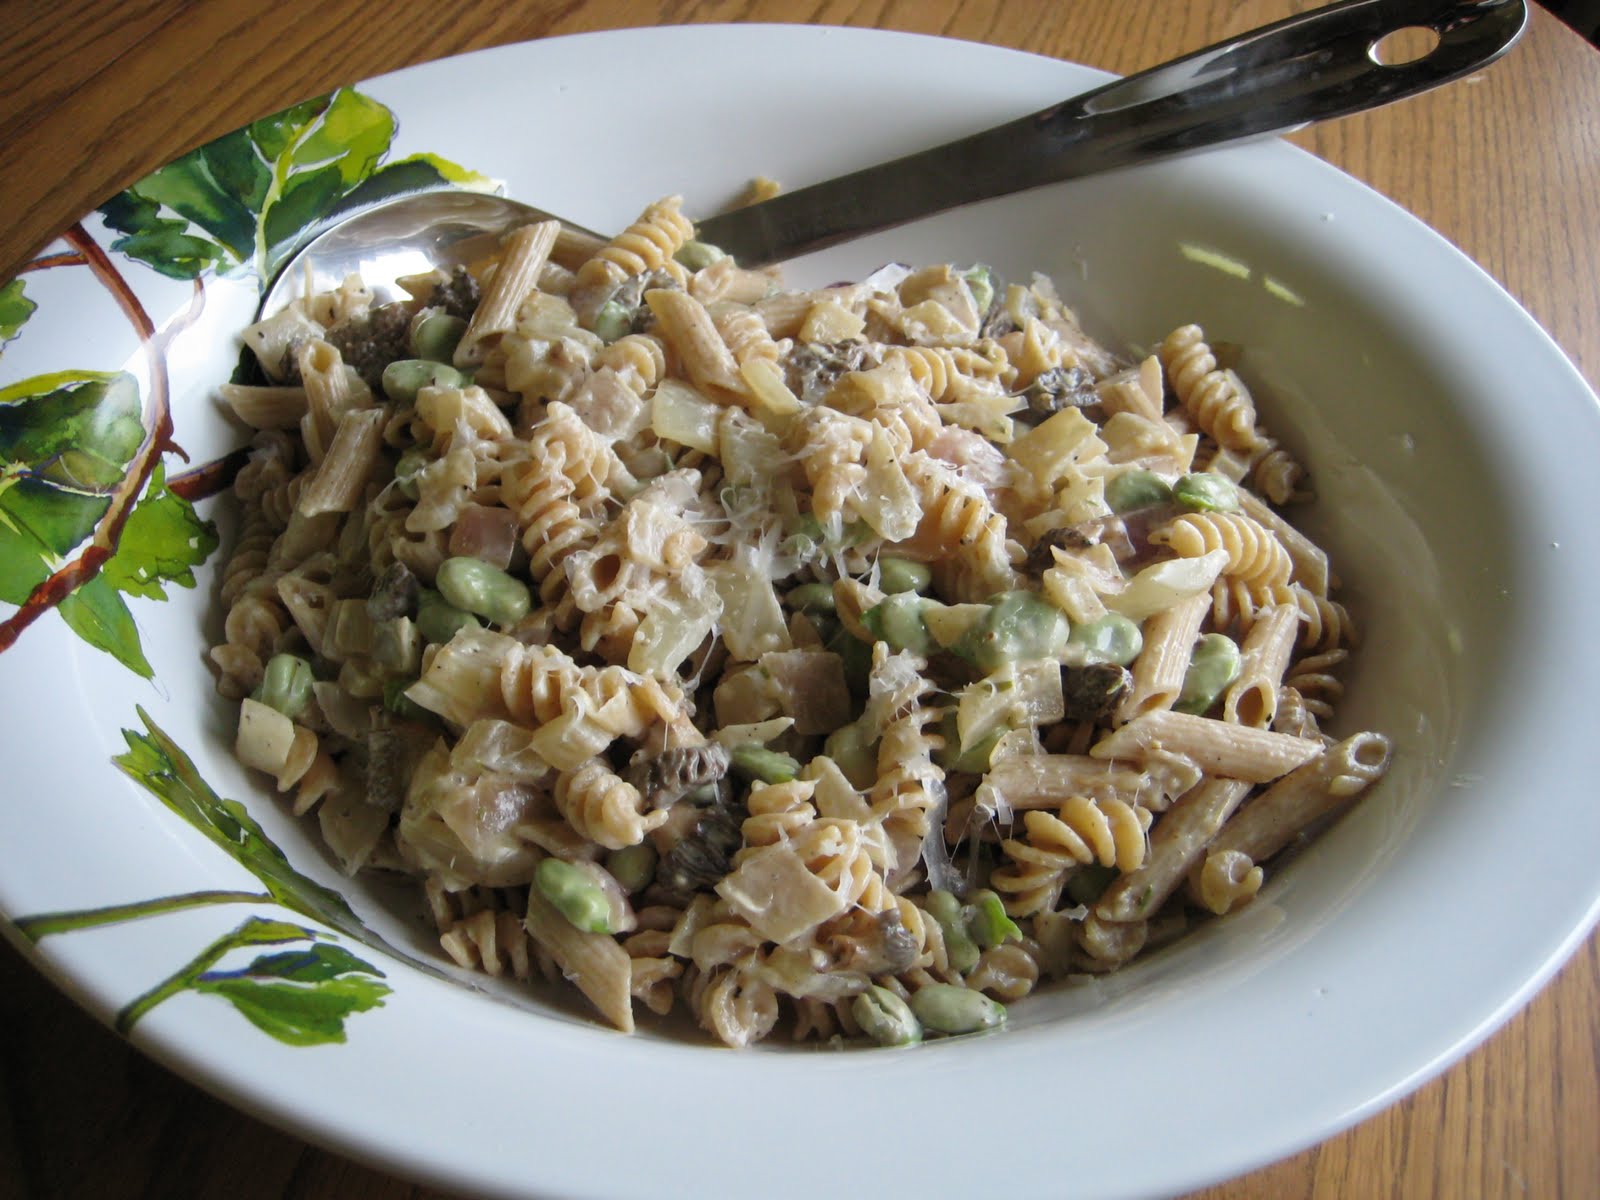
Creamy Pasta with Morels & Fava Beans
Ahhh, Spring time...after months and months of waiting - and believe me, I wait - I think it might actually be here! More daylight, temperatures consistently above 40 degrees, tulips and daffodils blooming and farmers markets coming back to life. I am such a sunshine person that, right about this time of year, I get the familiar bear-coming-out-of-hibernation feeling, ready to throw my winter clothes into the back of my closet with reckless abandon.
Amidst the craziness that has been our life for the past few weeks (inspections, grad school, mortgage shopping, grad school, inspection addendums, work) we managed to squeeze in a quick stop at our local farmer's market yesterday. Much to my intense pleasure, a new vendor, Mainly Mushrooms, had morels! Could there be a better way to kick off the Spring?
What the heck is a morel you say? Morel mushrooms are typically found in moist areas, around dying or dead Elm trees, Sycamore and Ash trees, old apple orchards and maybe even in your own back yard. You would be hard pressed to find fresh morels at a grocery store as they are usually foraged and not cultivated. Morels make their grand entrance right about now on the East coast and are commonly used in French cuisine. They taste best paired with butter (what doesn't?!) and eggs.
Here's what's cooking...
CREAMY PASTA WITH MORELS & FAVA BEANS
I adapted this recipe from the April 2011 issue of Cooking Light magazine. Fava beans are another Spring time treat. The beans have a buttery texture, slight bitterness and nutty flavor. After a long, dark winter, their bright green color pulls you right into Spring! This receipe is best served warm or room temperature.
Ingredients:
1 1/2 c. shelled fava beans
1 1/2 oz. cream cheese, room temperature
1 tbsp. milk
1 tbsp. water
8 oz. uncooked short-cut pasta
1 tbsp. extra virgin olive oil
1 c. onion, chopped
2 cloves garlic, minced
1 c. fresh morel mushrooms, halved
1 tbsp. butter
1 tsp. dried thyme
kosher salt, to taste
freshly cracked pepper, to taste

How to prepare:
If you've purchased fava beans in the pod, shell them like you would a sugar snap pea.


Bring 6 cups of water to a rolling boil, salt liberally and add your shelled fava beans. Allow the beans to cook for 45 seconds. Scoop the beans out and set aside, add your chosen pasta and cook according to package directions. Reserve 1 c. of the cooking liquid before straining.

Wisk together the cream cheese, 1 tbsp. milk and 1 tbsp. water until smooth; set aside. Alternatively, you could use 1/3 c. mascarpone cheese or even sour cream in place of the cream cheese mixture.
Heat a large skillet over medium-high heat. Add oil, onion and garlic to the pan. Saute until translucent. Add the fava beans, morel mushrooms, butter and reserved pasta cooking water. Cook until liquid is reduced to about 1/3 to 1/2 cup. Season to taste with salt and pepper.

Add the thyme, cream cheese mixture, and cooked pasta. Toss to coat. If desired, top with freshly grated parmesan cheese and revel in the fact that summer is only one season away!
Mar 27, 2011
Tempeh in Coconut-Peanut Sauce
A few months ago, I (hopefully) de-mystified tofu. This week I'm sharing a recipe for tempeh, another soy based protein, mostly because Tim - affectionately, spouse and dishwasher - absolutely loves this meal. It comes to you adapted from the cookbook Quick Fix Vegetarian by Robin Robertson. We were originally sold on the recipe's head notes, which state that the "sauce is so yummy, you may want to eat it with a spoon." I think, after having this several times, we would extend that to read the "sauce is so yummy, you may want to make extra so you can have it with the tempeh before eating the rest with a spoon."
Here's the dish on tempeh. It is a traditional soy product originally from Indonesia, made by a natural culturing and controlled fermentation process that binds soybeans into a cake form. The texture is similar to a very firm veggie burger or a well done hamburger. Tempeh's fermentation process and its retention of the whole soybean give it a higher-than-tofu content of protein, dietary fiber, and vitamins. It has a firm texture and strong flavor.
Like tofu, you can purchase tempeh at most health food stores or good grocery stores. I always recommend purchasing the organic version of soy-based foods and eating them in moderation. I have read recommendations about poaching the tempeh before using in recipes, which is how it is prepared here, but I also like the flavor and texture straight out of the package. You'll have to experiment and see which way you like it prepared.
Here's what's cooking...
TEMPEH IN COCONUT-PEANUT SAUCE
WITH CILANTRO & CASHEW JASMINE RICE
I like to double the sauce in this recipe and cook extra jasmine rice. We mix the two together and have it for leftovers. It is really delicious prepared by heating a skillet over medium-high and spreading out the rice in a layer. Leave it alone for about 3 or 4 minutes so the bottom starts to get crunchy. Then, stir, flatten out again and allow to crisp up further.

Ingredients:
1 package tempeh, cut into 1/2 in slices
1 tbsp sunflower oil
2 tbsp tamari, divided
1/3 c. peanut butter (it is best to use natural peanut butter with no added sugar or oil)
3 scallions, chopped
2 tsp ginger, minced
2 cloves garlic, smashed
3/4 c. light, unsweetened coconut milk
juice of 1 lime
1/2 tsp cayenne pepper
kosher salt, to taste
black pepper, to taste
2 c. jasmine rice, cooked
1/3 c. cilantro, chopped with 1 tbsp. reserved
1/4 c. cashews (raw or toasted), chopped
1/4 c. peanuts, chopped
How to prepare:
Poach the tempeh in a skillet of simmering water for 7 minutes.

Drain and blot dry. Heat the oil in a skillet over medium-high heat. Add the tempeh and cook until browned on all sides. Toss in 1 tbsp. of the tamari. Set aside.
In a food processor, combine the peanut butter, scallions, ginger, garlic, coconut milk, lime juice, cayenne and the remaining tbsp. of tamari.

Process until smooth, adding more cayenne if you prefer. Season to taste with salt and pepper. Stir the sauce into the skillet and simmer until hot.

Meanwhile, stir together the cooked jasmine rice, cilantro, and chopped cashews.

To serve, plate the rice and top with the tempeh/sauce mixture. Garnish with the reserved cilantro and chopped peanuts.
Did you double the sauce?
See the notes above for preparation of the leftover rice and sauce. This is what it looks like....yum!

Mar 13, 2011
Mushroom, Olive & Goat Cheese Pizza
My husband could happily eat pizza every day of his life. Probably true for most Americans at least, there is just something about a hot, crunchy, cheesy piece of pizza that makes life for that moment feel okay! Although my favorite is the traditional Margherita with thick, fresh slices of mozzarella and whole basil leaves, I love to try unexpected flavor combinations.
While in Seattle last summer visiting the lovely Marissa, I got to eat at Serious Pie - a restaurant made famous by Food Network's Best Thing I Ever Ate pizza edition with Tyler Florence expressing his love. We had an arugula pesto pizza with buffalo mozzarella that was out of this world. The secret they have, in my opinion, is the crust, which has the perfect mix of crunchy/chewy and an interesting airiness about it. Serious Pie also makes elegant topping combinations.
What's your favorite style of pizza? Where do you think serves up the best slice? Post a comment and share! Considering my husband's love for the stuff, we may just have to hop in the car and go try it.
Here's what's cooking...
How to prepare:
Preheat your oven to 450 degrees. If you're using a pizza stone, which I highly recommend, make sure the stone is in the oven as it preheats.
In a large skillet, heat the olive oil over medium-high heat. Add the onions and saute until soft. Add the garlic and mushrooms.


While in Seattle last summer visiting the lovely Marissa, I got to eat at Serious Pie - a restaurant made famous by Food Network's Best Thing I Ever Ate pizza edition with Tyler Florence expressing his love. We had an arugula pesto pizza with buffalo mozzarella that was out of this world. The secret they have, in my opinion, is the crust, which has the perfect mix of crunchy/chewy and an interesting airiness about it. Serious Pie also makes elegant topping combinations.
What's your favorite style of pizza? Where do you think serves up the best slice? Post a comment and share! Considering my husband's love for the stuff, we may just have to hop in the car and go try it.
Here's what's cooking...
MUSHROOM, OLIVE & GOAT CHEESE PIZZA
I adapted this recipe from the Gluten Free Vegan by Susan O'Brien. The recipe was written with a gluten free crust, but we just use a traditional whole wheat crust recipe. If you're pressed for time, my sister-in-law suggests picking up pre-made pizza dough balls from your local grocery store. You'll get the taste of a freshly prepared crust without all the prep time!


Ingredients:
1 ball fresh pizza dough
1 tbsp. extra virgin olive oil
1 med. onion, chopped
4 clove garlic, chopped
1 med. onion, chopped
4 clove garlic, chopped
8 oz. mushrooms, chopped
1/2 c. kalamata olives, pitted and halved
2 tbsp. toasted pine nuts
12-14 oz. tomato puree (or your favorite jarred sauce)
12-14 oz. tomato puree (or your favorite jarred sauce)
2 tsp. your choice seasonings (try a combination of fresh basil, dried oregano or thyme)
1/2-1 tsp. red pepper flakes depending upon your desired amount of heat
3 oz. goat cheese, crumbled
How to prepare:
Preheat your oven to 450 degrees. If you're using a pizza stone, which I highly recommend, make sure the stone is in the oven as it preheats.
In a large skillet, heat the olive oil over medium-high heat. Add the onions and saute until soft. Add the garlic and mushrooms.

Continue to saute until the mushrooms are a deep golden brown, about 5-7 minutes.

Meanwhile, stretch or roll out your pizza dough to your desired size. I used to always roll out my dough with a french pin, but I've found that stretching it actually makes the crust texture better. It enables you to make the center thinner, so it gets crispier, leaving the crust area thicker for a chewier texture there.

Add the olives and pine nuts to the mushroom mixture.

Stir in the tomato puree as well as your selected seasonings and the red pepper flakes until combined and heated through. Season to taste with salt and pepper.
Pull your stone out of the oven and transfer your crust. This is easiest if you fold the dough into quarters, placing the point of the fold in the center of the stone. Unfold the dough and spread the mushroom mixture over the crust. Top with crumbled goat cheese.

Bake for 15-20 minutes until the goat cheese is golden and the crust is crisp.

Allow to cool slightly before cutting and serving. Enjoy!
Mar 5, 2011
Make Ahead Power Breakfast
In college I, like many others, gained the freshman fifteen. Only it was more like the junior fifty. By the spring of my junior year, I was totally fed up and along with my best friend decided to join Weight Watchers. For those of you who have never tried it, the program is, in my opinion, the healthiest weight loss plan around (especially when coupled with physical activity), fairly fool-proof and really does work. I lost all 50 plus 5 more over the course of a year and have kept a healthy and maintainable 45 pounds off since.
While this is not a weight loss blog, I do want to share that the three best strategies I learned from Weight Watchers help me control the pounds to this day: planning ahead, controlling portions and eating filling foods. Rocket science? Definitely not! But especially in American culture, it is surprisingly difficult for most people to do all three - or even one sometimes! Over the years, if I have found my weight creeping up a little, I can usually identify that it is because I've either been getting a little crazy with the portions or not planning ahead/eating on the fly. Once I reign in, the few pounds here and there fall right off.
Although it takes a little bit of time, a portion of my weekends are spent planning and prepping for the week ahead. I know that after I've commuted 65 miles, worked 8 hours, gone to class and commuted 65 miles home, the last thing I want to do is stand in front of the refrigerator or pantry for 20 minutes, trying to figure out what the heck to cook for dinner. Meanwhile, starving, I will be eating a spoonful of peanut butter or a handful of potato chips (that my husband insists on having in the house!).
To prevent this potentially disastrous situation -for my mood and my waistline- before grocery shopping on the weekend, I plan out our meals for the week including breakfast, lunch, dinner and snacks. Once I get back from the grocery store, I do tons of prep like cleaning and chopping vegetables, making snacks such as hummus, trail mix and hard boiled eggs, and preparing a week's worth of breakfast so getting ready in the morning is easier.
For me, breakfast is the most important meal of the day. I am one of those people who wakes up with a grumbling stomach. And I can't survive on a measly english muffin or bowl of cereal. I need a substantial breakfast (and large cup of coffee) in order to even think about functioning properly.
Here's what's cooking...
BREAKFAST MILLET
WITH EGG, SPINACH AND TOMATO
For every ~215 calorie serving, you'll want to use one egg and 1/2 cup cooked millet. The instructions below make about 7 servings. This recipe combines millet, which is gluten free, protein-filled eggs and nutrient dense vegetables for a filling power breakfast. Store in individually portioned containers and either eat cold or heat in a small skillet (we don't have a microwave!) for 5 minutes. I would pair this with a piece of fruit to round out my breakfast.

Ingredients:
3 1/2 c. cooked millet (about 1 c. dry)
1 tbsp. extra virgin olive oil
1 lg. onion, chopped
2 c. fresh spinach
7 eggs, whisked together
3/4 c. cherry tomatoes, quartered
kosher salt to taste
freshly cracked black pepper to taste
How to prepare:
If you've never cooked with millet before, here are good instructions. For this recipe, I recommend toasting the millet and using the dry and fluffy preparation method.

While the millet is cooking, heat the oil in a skillet over medium. Saute the onions until soft. Reduce the heat to medium-low, add in the spinach and allow to wilt slightly. Add in the eggs and scramble to desired texture. Turn off the heat and add in the tomatoes.

Combine the cooked millet with the scrambled egg mixture and season to taste with salt and pepper. Divide into 7 equal portions and enjoy a hassle free breakfast all week!
Veggie Swap
I really like to experiment with veggies in eggs. This would be delicious with with zucchini and carrots instead of the spinach. You could also try it with a sweet potato or swiss chard. The possibilities are endless and you would be surprised to find how well most veggies go with the scrambled morning staple!
New to millet?
Millet is tiny in size and round in shape and can be white, gray, yellow or red. The most widely available form of millet found in stores is the pearled, hulled variety. Although oats have been widely publicized for their heart-protective properties, millet is a grain that should also be included on your list of heart-healthy choices because of its status as a good source of magnesium. A cup of cooked millet provides 26.4% of the daily value for magnesium. It is also an excellent gluten-free whole grain, a good source of fiber and protein.
Mar 4, 2011
For the love of Brie
I have a love affair with cheese. If you've been reading my posts since the beginning, you'll notice a pattern whereby a lot of the recipes contain cheese. At times it is a love/hate relationship, however, because cheese is not only absolutely delicious but is also loaded with calories and fat. I also hate to say it, but cheese is not really among the most nutrient dense foods one could consume. It's best to eat in moderation!
There are hundreds of different types of cheese that can be differentiated both by the type of milk - raw, skimmed or pasteurized, and by the animal - cow, goat, sheep, buffalo, horse or camel. Strict vegetarians should be careful when selecting cheese as it can be made with or without rennet which is derived from the stomach tissue of a slaughtered calf. As with anything, be sure to read the ingredients list.
Straight to you from, that's right, cheese.com, here are some cheese handling tips:
Here's what's cooking...


There are hundreds of different types of cheese that can be differentiated both by the type of milk - raw, skimmed or pasteurized, and by the animal - cow, goat, sheep, buffalo, horse or camel. Strict vegetarians should be careful when selecting cheese as it can be made with or without rennet which is derived from the stomach tissue of a slaughtered calf. As with anything, be sure to read the ingredients list.
Straight to you from, that's right, cheese.com, here are some cheese handling tips:
- Keep cheese in conditions in which it matures. Hard, semi-hard and semi-soft cheeses are stored in the temperatures from around 8 - 13 C.
- Cheese contains living organisms that must not be cut off from air, yet it is important not to let cheese dry out. Keep it wrapped in waxed paper and place it in a loose-fitting food-bag so as not to lose humidity and maintain the circulation of air.
- Wrap blue cheeses all over as mold spores spread readily, not only to other cheeses but also to anything nearby.
- Chilled cheeses should be taken out of the refrigerator one and a half or two hours before serving. This will allow the flavor and aroma to develop.
- Do not store cheese with other strong-smelling foods. As a cheese breathes, it will absorb other aromas and may spoil.
Here's what's cooking...
PEAR, BRIE & OLIVE TART
WITH CARAMELIZED ONIONS
This dish is an adventure for your senses. The crisp, sweet pear contrasted by the salty bite of the olives and the creaminess of the brie and the buttery tart crust is divine. I adapted the recipe from Jesse Ziff Cool's Simply Organic and would serve it with a simple green salad and glass of red wine. I'm sure you can guess this was one of our Saturday night indulgences!

Ingredients:
a good pie crust
1 tbsp. extra virgin olive oil
1 red onion, thinly sliced
2 tsp. sugar
1 tsp. dried thyme
1/2 tsp. dried sage
1/2 tsp. kosher salt
1 tsp. freshly cracked black pepper
2 ripe pears, cored and thinly sliced
4 oz. brie, sliced
1/2 Kalamata olives, pitted and halved

How to prepare:
Preheat the oven to 400 degrees. In a small skillet, heat the olive oil over medium and add the red onion. Allow to soften slightly. Add the sugar, thyme, sage, salt and pepper.

Continue to cook the onion over medium/medium-low heat until caramelized, about 25 minutes.

Meanwhile, roll out your pie crust on a lightly floured piece of parchment or wax paper. This will make it easier to fold over the edges of the crust to make the rustic tart shell.

Arrange the pears in the center of the crust, leaving a 1 1/2 to 2-inch border. If you want to get all fancy, you could arrange them in concentric circles, but I am not a fussy cook and just plop them on. Top with the onions, brie and olives.
Using the sides of the parchment paper to help, gently fold up the edges of the crust all the way around the filling, pressing gently.

Bake for 20-30 minutes, or until the crust is golden brown.

Slice and serve warm. What a treat!
Salad that Makes a Meal
I've professed my love for salads in an earlier post, but it is worth revisiting. I was at a restaurant for a lunch meeting at work a few weeks ago, combing through the menu for a veg-friendly meal that did not contain pasta. I was underwhelmed by the entree salad options, observing that restaurants think they can throw a piece of grilled chicken or ahi tuna on top of some greens and call it a day. While I'm sure many people enjoy that type of meal, how about a little more effort to create a balanced meal -- or perhaps, I don't know, some imagination?
My recipe post for today is a salad worthy of the entree category. It combines a hearty grain and garbanzo beans for fiber and protein, marinated vegetables for nutrients, flavor and color and extra virgin olive oil for heart healthy fat. I can assure you that even a steak and potatoes eater will feel satisfied by this dish.
Here's what's cooking...
MEDITERRANEAN SALAD
WITH GARLIC-LEMON DRESSING
This one is adapted from Robin Robertson's Quick-Fix Vegetarian and is both beautiful and delicious. Unlike most salads, this one is great to make ahead and eat all week. In fact, it tastes better once it sits for a little while. I prepared this today to bring to work for lunch throughout next week. Simply store the greens separate from the rest of the salad and combine just before eating. Mediterranean Salad is best served at room temperature.

Ingredients:
1 c. dried garbanzo beans, pre-soaked overnight in 6 c. water
1 1/2 c. your favorite grain, cooked
1 stalk celery, chopped
2/3 c. marinated artichoke hearts, drained and roughly chopped
1/2 c. oil-packed sun-dried tomatoes, drained and roughly chopped
1/2 c. Kalamata olives, pitted and roughly chopped
1-2 tbsp. capers, roughly chopped
4 scallions, minced
4 cloves garlic, minced
juice of 2 lemons
1 1/2 tsp. dijon mustard
1-2 tbsp. extra virgin olive oil
kosher salt to taste
freshly cracked black pepper to taste
1/2 c. fresh flat-leaf parsley, chopped
1/4 c. toasted pine nuts (see how here)
salad greens for serving
How to prepare:
Put your pre-soaked garbanzo beans with their soaking water into a saucepan, cover and cook on medium for about 60 minutes until they've reached a desired texture. If you want to make a true quick-fix meal and skip this step, you can sub the dried beans for a 14 oz. can. However, if you have the time, I encourage the use of the dried. Prepared fresh, they taste much better and you'll skip all that added salt.
While your beans are cooking, prepare your choice of grain. I like to use bulgur, but this would be delicious with barley, kamut, spelt or even orzo if you're in a mood for pasta.
In a large bowl, combine the cooked grain, celery, artichoke hearts, sun-dried tomatoes, olives, capers, and scallions. Set aside.

In a separate bowl, whisk together the garlic, lemon juice, dijon mustard and olive oil. Season to taste with salt and pepper.

When cooked, drain and add the warm garbanzo beans to the grain mixture. Pour the dressing over the beans while still warm. This will help the dressing soak in and flavor the beans. Mix well. Taste for seasoning and add salt/pepper if necessary. Add in the parsley and toasted pine nuts and toss to combine.

Serve over your favorite greens. I normally have this over fresh spinach, but happened to have a field green mix on hand. Any type of green will do or you could eat it as is. Enjoy a hearty good-for-you salad!
Never tried bulgur?
Bulgur is a super healthy whole grain often confused with cracked wheat. Among other nutrients, one cup of dry bulgur contains approximately 25g of fiber, 17g of protein, and 574mg of potassium. Its high nutritional value makes it a good substitute for rice or couscous. It can also be used in pilafs, soups, baked goods, or as stuffing. It is a main ingredient in tabbouleh, and in Indian cuisine, bulgur is used as a cereal with milk and sugar. Give it a try!
Feb 23, 2011
Buttermilk Blue Bruschetta & Black Bean/Mango Empanadas
My husband and I are training for a 10 mile race this Spring, and with an active lifestyle comes the need to ensure that we are adequately fueling and hydrating our bodies. He does three and I do four maintenance runs during the week and then we have a long run that we do together on Saturday mornings. It can get pretty hectic during the week between work, grad school, taking care of our pets, cooking and making time for each other. Being busy combined with the fact that we eat very clean all week long makes for a serious desire to treat ourselves with an indulging meal (and of course, wine/cocktails) come Saturday evening. Who wants all work and no play, right?!
Saturday night menus often include meals that I would normally not have the time or available calories during the week to prepare and enjoy. Its when I make pasta, bread and other comfort dishes in the winter and homemade ice cream or sorbet in the summer. On special nights, I make a couple different appetizers and we eat tapas style!
This menu was partially inspired by one of my favorite restaurants in Philly called Tria. Tria is a wine, cheese and beer cafe that offers locally sourced ingredients. If you're in the Philly area, stop in for a glass of wine and try my favorite bruschetta: Birchrun Blue and Spiced Lancaster Pear Butter.
Here's what's cooking...
BUTTERMILK BLUE BRUSCHETTA
WITH RAW CLOVER HONEY
This is a really simple and beautiful appetizer. The flavor/texture combination is divine as the creamy tang of the blue cheese is well balanced by the sweetness of the honey and crunch of the baguette toasts. This would be delicious with real maple syrup in place of the honey. I like to serve it with fresh pear slices.

Ingredients:
1 day-old french baguette, sliced every 1/2 inch on the diagonal
good olive oil
kosher salt
freshly cracked black pepper
8 oz your favorite blue cheese (a wedge is better than crumbles)
2 tbsp. your favorite raw honey for drizzling

How to prepare:
Preheat the oven to 425 degrees. Place the baguette slices on a baking sheet, drizzle with olive oil and sprinkle with kosher salt and freshly cracked black pepper. Bake for 15 minutes or until golden brown.

While slightly warm, top toasts with 1/2 oz or so slices of the blue cheese. Drizzle honey over the blue cheese and pat yourself on the back if they made it to the serving platter before your tummy.
BLACK BEAN AND MANGO EMPANADAS
It is rare that I make a recipe straight from the source without doctoring it to my liking. This one is an exception because it is so delicious as is. Directly from the pages of Intercourses: An Aphrodisiac Cookbook by Martha Hopkins, Randall Lockridge, and Ben Fink, Black Bean and Mango Empanadas are a wonderful use for ripe, juicy mangoes and an indulging treat after a long, hectic work week.

Ingredients:
1 tbsp. olive oil
3/4 c. yellow onion, diced
15 oz. black beans
1 tbsp. ground cumin
1/4 tsp. cayenne pepper
splash of beer for moistening
1/4 c. cilantro, chopped
kosher salt to taste
freshly cracked black pepper to taste
17.3 oz. package puff pastry (2 sheets), thawed
1 ripe mango, peeled and diced
1 lg. egg, beaten
How to prepare:
Heat a skillet over medium heat and add the olive oil. Saute the onion until translucent. Stir in the beans, cumin and cayenne; cook until the mixture is hot, about 5 minutes.

Add a splash of beer if needed to keep mixture from drying out. Stir in the cilantro, and season with salt and pepper to taste. Using a potato masher or a fork, mash the bean filling to a coarse paste and let cool.

Preheat the oven to 425 degrees and grease a rimmed baking sheet. Roll out each puff pastry sheet on a lightly floured surface to a 14-inch square. Cut each sheet into 9 squares with a sharp knife.
Place 1 heaping tablespoon of filling in the center of each square. Top with a few pieces of mango.

Brush the inside edges of the squares with the beaten egg. Fold on the diagonal over the filling to form a triangle. Using the tines of a fork, seal the crust edges well. Arrange on the baking sheet and brush the tops with the remaining egg.

Bake until golden brown, about 15 minutes. Serve hot. Mmmmm! These would be delicious topped with mango chutney.
Subscribe to:
Posts (Atom)